Unbricking the C720 Chromebook with the BeagleBone Black or Raspberry Pi
As a regular Linux user, I am extremely happy with the Acer Chromebook C720 that I bought almost 1 year ago. The Chromebook line is one of the more libre lines of laptops that is not compromising on features, power or price. With some fixable quirks, it runs Linux (in my case, Kubuntu) almost flawlessly out of the box with full support for suspend/resume.
However, there is one tricky thing about the Chromebook, that is its BIOS. By default, the Chromebook BIOS only boots signed images of the ChromeOS operating system. In order to install a custom operating system, one would have to turn the Chromebook into Developer mode. In the Developer mode, the machine shows a "scary screen" whenever it boots up, which is annoying. A more serious concern is that if one happens to let the battery fully depleted, the machine forgets that it is in the developer mode. It then would refuse to boot the custom OS, and force the user to delete all the data in the SSD while restoring the original operating system.
Luckily, the Chromebook BIOS is based on the Coreboot project. It is not terribly hard to flash a new image of the fully Open source Coreboot into the machine, which is conveniently provided by John Lewis. The only tricky part about changing the BIOS to a liberal one was that if the process goes terribly wrong, you will end up with a $200 brick. I was one of the more unlucky people to have flashed the non-working image to the machine. After I waited and checked carefully that the computer was not showing up in my router control-panel, I knew it's time to go hardcore on BIOS flashing.
There are plenty of places with information on unbricking the BIOS, however the guides out the on the net require me to buy two pieces: The SOIC clip and the BusPirate. Since the BusPirate is slow as molasses, I would have to wait for one hour for the thing to be flashed.
More seriously, it was the end of the month and everyone knows that every graduate student is broke at the end of the month. So I decided other than buying the SOIC clip for $20 I was not going to spend another $40 buying a BusPirate, I would try to stick with what I had which is a BeagleBone Black. So I dug into the flashrom.org supported programmers list and was delighted to read the docs. It turned out that Flashrom supports linux spidev, which the BeagleBone Black has. If you are looking for unbricking your Chromebook and don't have a BeagleBone Black, a good news is that the Raspberry Pi has spidev support, too!!
So I am writing this down for whoever happens to brick their Chromebook by fiddling with the BIOS my experiences unbricking the laptop with my BeagleBone. Hopefully it will save you some money on buying the BusPirate, which happens to be 1/5 the price of the Chromebook itself.
Getting spidev to show up on BeagleBone Black
Contrary to the "just works" Raspberry Pi, the BeagleBone Black is a little bit tricky. It doesn't expose the spidev by default, so I had to manually enable it by compiling the device tree definition and modifying the uEnv.txt. For the most part I followed what is laid out in the wiki. If you are trying to do the same thing, I have a trick that is not mentioned in the wiki to save you from the agony of re-compiling the freaking kernel just to get the spidev working. Instead of defining compatible = "linux,spidev";, in the dts file, you can define compatible = "rohm,dh2228fv";. Then, I had to install device-tree-compiler from source because the version that comes with ubuntu trusty is too old and would complain when I tried to compile the provided dts file. Notice that the BeagleBone Black has two spidevs, I used the SPI0 interface so I would not have to disable my HDMI out interface for it.
Checking spidev with software
Regardless of having the Raspberry Pi or the BeagleBone Black, we should make sure that spidev is working. This can be done by using a single jumper cable to bridge the MOSI (DO) and MISO (DI) of the headers on the Raspberry Pi or BeagleBone Black (Click on links to see diagrams). Then, on the software side, we have to download and compile the spitest program https://www.kernel.org/doc/Documentation/spi/spidev_test.c (by issuing $ gcc -o spidev_test spidev_test.c). Upon running with argument $ ./spidev_test -D /dev/spidev_whatever it should return you DEADBEEFBAADFOOD. If the program doesn't (All 0's or all F's), check your pinouts and configuration, you have done something wrong.
Connecting the wires
Finally the SOIC clip came and it was the most magical device I have seen – it clipped just right on the SMT chip nicely! So I needed to do was to figure out the wirings of the chip.
Here is a helpful figure that we need (credits to chromebooklinux blog):
              ┌───── Little "dot" on the EEPROM chip
              │
             ╔═════════╗
    CS#    1═╣o     ┌──╠═8    VCC
   MISO    2═╣      ├──╠═7    HOLD#
    WP#    3═╣──────┘  ╠═6    SCLK
    GND    4═╣         ╠═5    MOSI
             ╚═════════╝
Notes: Bridge pins 3 and 7 to pin 8 on the clip (short them together), then connect it to the 3.3V pin on the BeagleBone Black. The MISO and MOSI pins should be connected to the MISO (DI) and MOSI (DO) pins of the BeagleBone Black or Raspberry Pi, respectively. Everything else is just a straight wire device-to-chip connection, nothing fancy needed. Be very careful of the 5V pin on the Raspberry Pi, if you mistakenly connect the 5V to the 3.3V it will fry the chip!
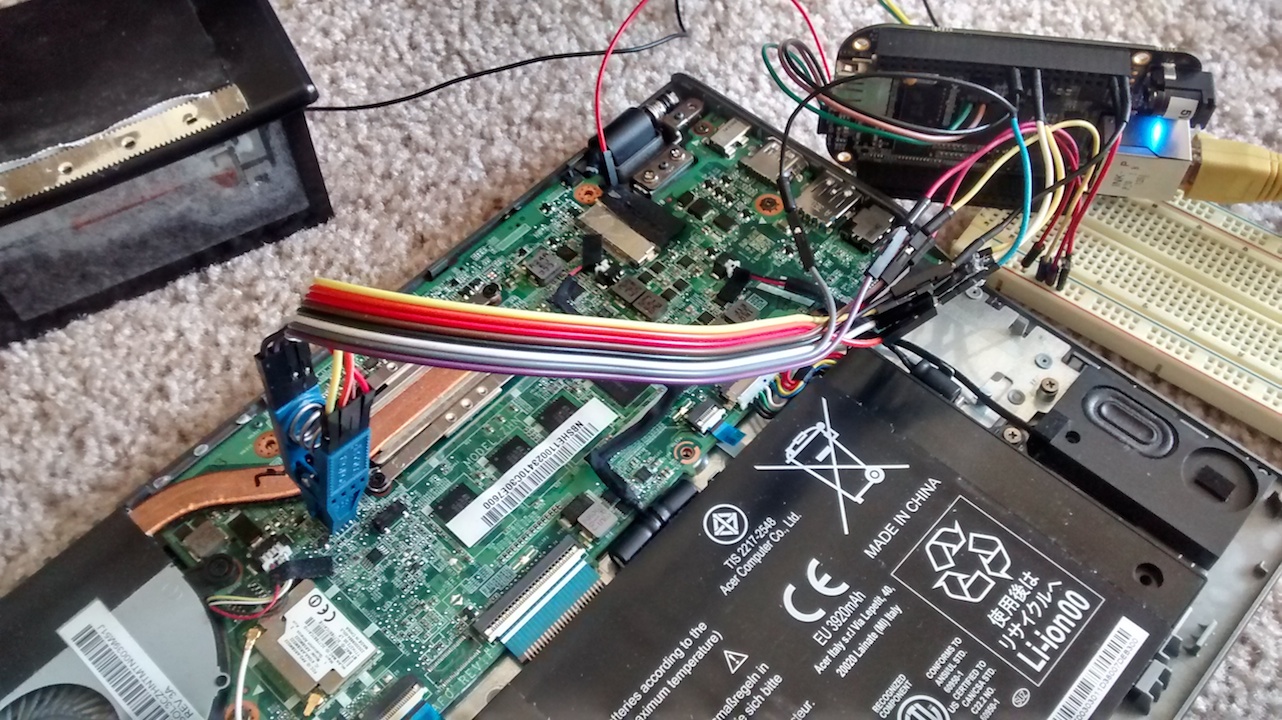
Something like this:
 </div>
Then flashing the BIOS was a piece of cake:
./flashrom -w rom-image.bin -VVV -p linux_spi:dev=/dev/spidev_whatever
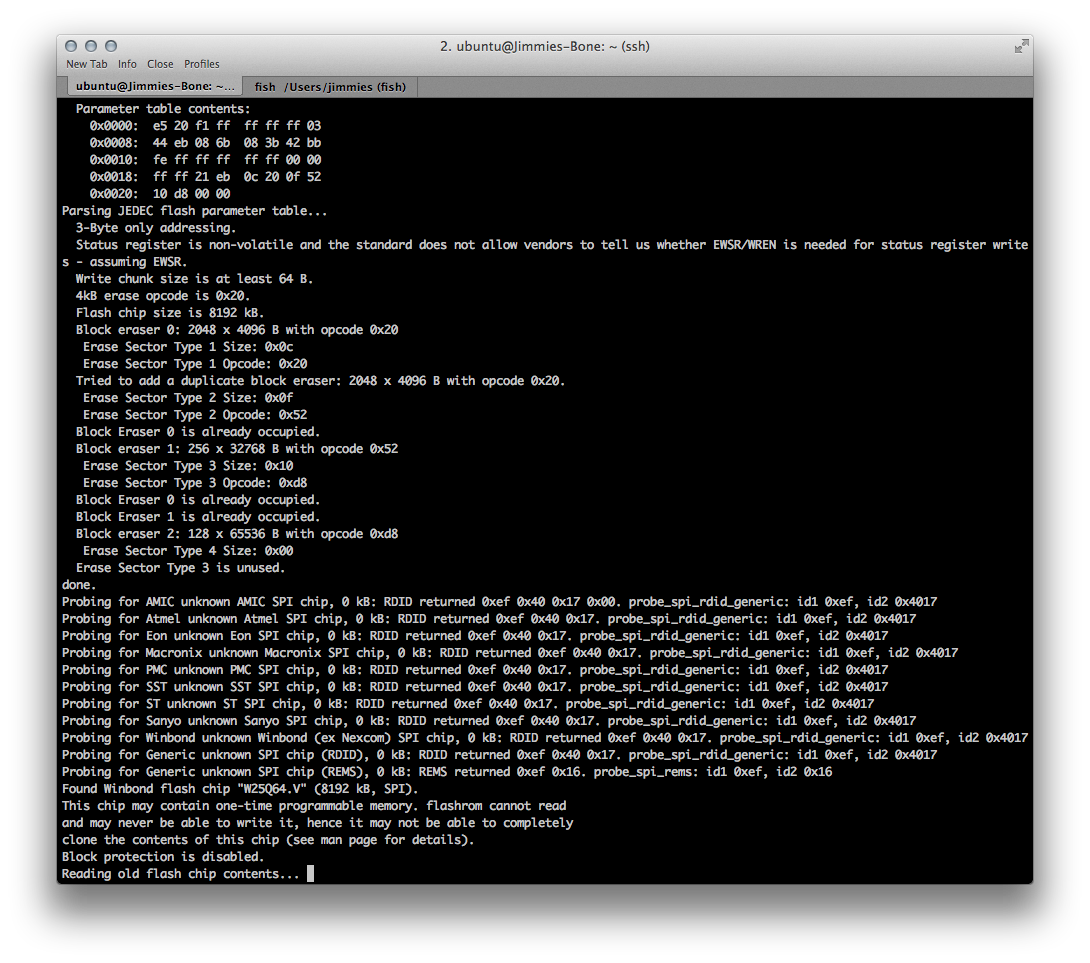
Flashrom told me it found the chip!

After about 1 minute later, Flashrom told me it finished flashing the chip, and about 5 minutes later I had my Chromebook fully revived!
TIP: Many of the consumer routers and PC also use the 8-pin SOIC package which can be flashed the same way. You know what to do…
Edited on 09/09/2014: Thanks Tyler for corrections on the flashrom command.