Show-me Webcam: Building an open-source and high-quality webcam with a Raspberry Pi 0 W
(As with any recipe, if you just want to see how to build the webcam yourself, skip to the Recipe section. The following wall of text is just my life story.)
My motivations
I've been thinking about webcams for a while after I read about numerous pieces about how terrible laptop built-in webcams are in the day and age of zooming-from-home. People seem to have problems with laptop built-in webcams on the following aspects:
- The webcams that come with your laptops (even the most expensive ones) have terrible picture quality.
- They can't be trusted: People put tapes on them. You are advised against doing it, though.
There are a couple of remedies people came up with for the built-in webcam quality:
- Buy an external webcam. Cons: They only give marginally better results on picture quality.
- Use your phone to do meetings. Cons: Small phone screen, impossible to see shared meeting screens well, impossible to share screens, impossible to access work documents at the same time, limited by the functionalities that the mobile app provides.
- Use your phone as a webcam. Cons: Cumbersome software setup, lags.
- Use a professional camera + HDMI capture card as a webcam.
Many "professional" streamers choose the last solution, and I have tried to do it myself too. It took me two months to wait for my $50 capture card from China to arrive. Then when it finally came, I realized this is a very cumbersome setup. First, my camera (a Sony NEX-5R) cannot output a "clean" HDMI output (i.e. without the GUI elements). The only way to get rid of that stupid overlay is to buy another newer camera (say, a Sony A7 is $500+ used). Second, the camera does not charge or stay charged on USB, so I have to buy another dummy battery that feeds from a DC source. Third, this setup is not portable.
Moreover, none of the above solutions allow us to trust, control, and improve on them (At least, physically disconnecting them solves the privacy concern, which isn’t something you can do with a laptop built-in camera).
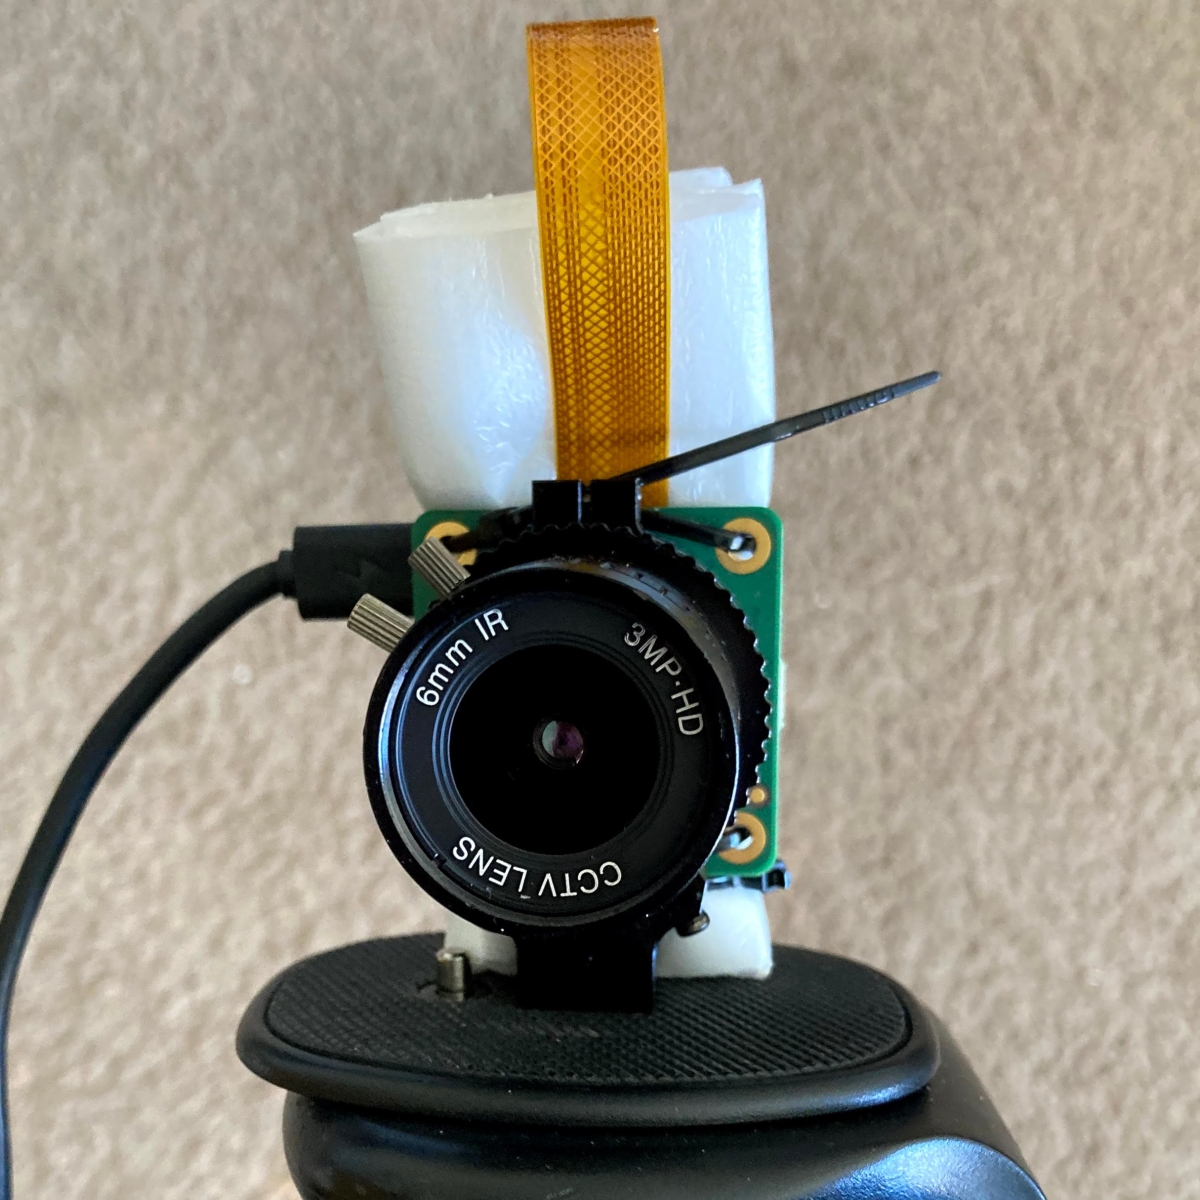
The Raspberry Pi High-Quality Camera
So I set out to build a webcam of my own. Recently, I noticed that the Raspberry Pi Foundation released a high-quality camera, which is a fantastic candidate. It's a professional camera with a very big sensor and an assortment of interchangeable lenses. Being in the right hands, this can be a very powerful tool to achieve many things. Can it be a webcam to use with my ordinary computer though?
I know it is possible to stream the webcam over the network, and then use a computer to turn the network stream back to a virtual webcam. However, because this setup depends on the operating system, the setup is not portable. It also introduces lags which makes the voice trails behind the images.
So in short, I want the Pi Camera to appear as just an ordinary USB webcam to my laptop.
With a bit of googling, I learned that it is possible to make the Pi appear as a USB webcam! There is a mode on the Pi 0 USB port called USB gadget mode, which makes that port a guest port for the system it's plugged in to. I got a good start with Dave Hunt's post. However, there are things to be desired with his software solution. First, it uses Raspbian as a base, which means you have a writable root, and an abrupt disconnection of power (we will do that with a webcam) will cause filesystem corruption. Second, the camera takes a long time to start. Those are the two main barriers to this approach: It works as a hack, but it works less well as a solution you'd depend on.
So, I set out to build a more robust firmware for the project. The following is the documentation of what I did to get the firmware working, and I think what I went through can be helpful if you want to roll your firmware to do things you'd like a dedicated embedded firmware for your Pi 0, too.
Building a webcam embedded firmware with Buildroot
One of the tools that I grew fond of recently is Buildroot. Buildroot is a framework/tool to allow you to roll out your own Linux OS/distribution for embedded devices. It powers a couple of big projects. So I set out to build my firmware with Buildroot.
I plan to do the following:
- Do the initial bring-up and get the baseline firmware with busybox working.
- Get the firmware to connect to my Wi-Fi network and enable SSH access.
- Do all the customizations to bring up the UVC webcam.
- Disable Wi-Fi and SSH access.
- Add optimizations to protect the device from abrupt power disconnects.
For step 1, I followed the tutorial on ARM fever to have to build a baseline image. Except having to tweak some wireless issues so I could remotely debug the Pi 0 via SSH, the tutorial was spot-on. I knew if the Pi 0 only USB OTG port was in peripheral (gadget) mode, it would have been impossible to connect a USB ethernet dongle to it, so SSH-over-wireless was essential. The package for enabling the SSH access to the Pi is dropbear. Getting a buildroot Pi working with dropbear took me a night.
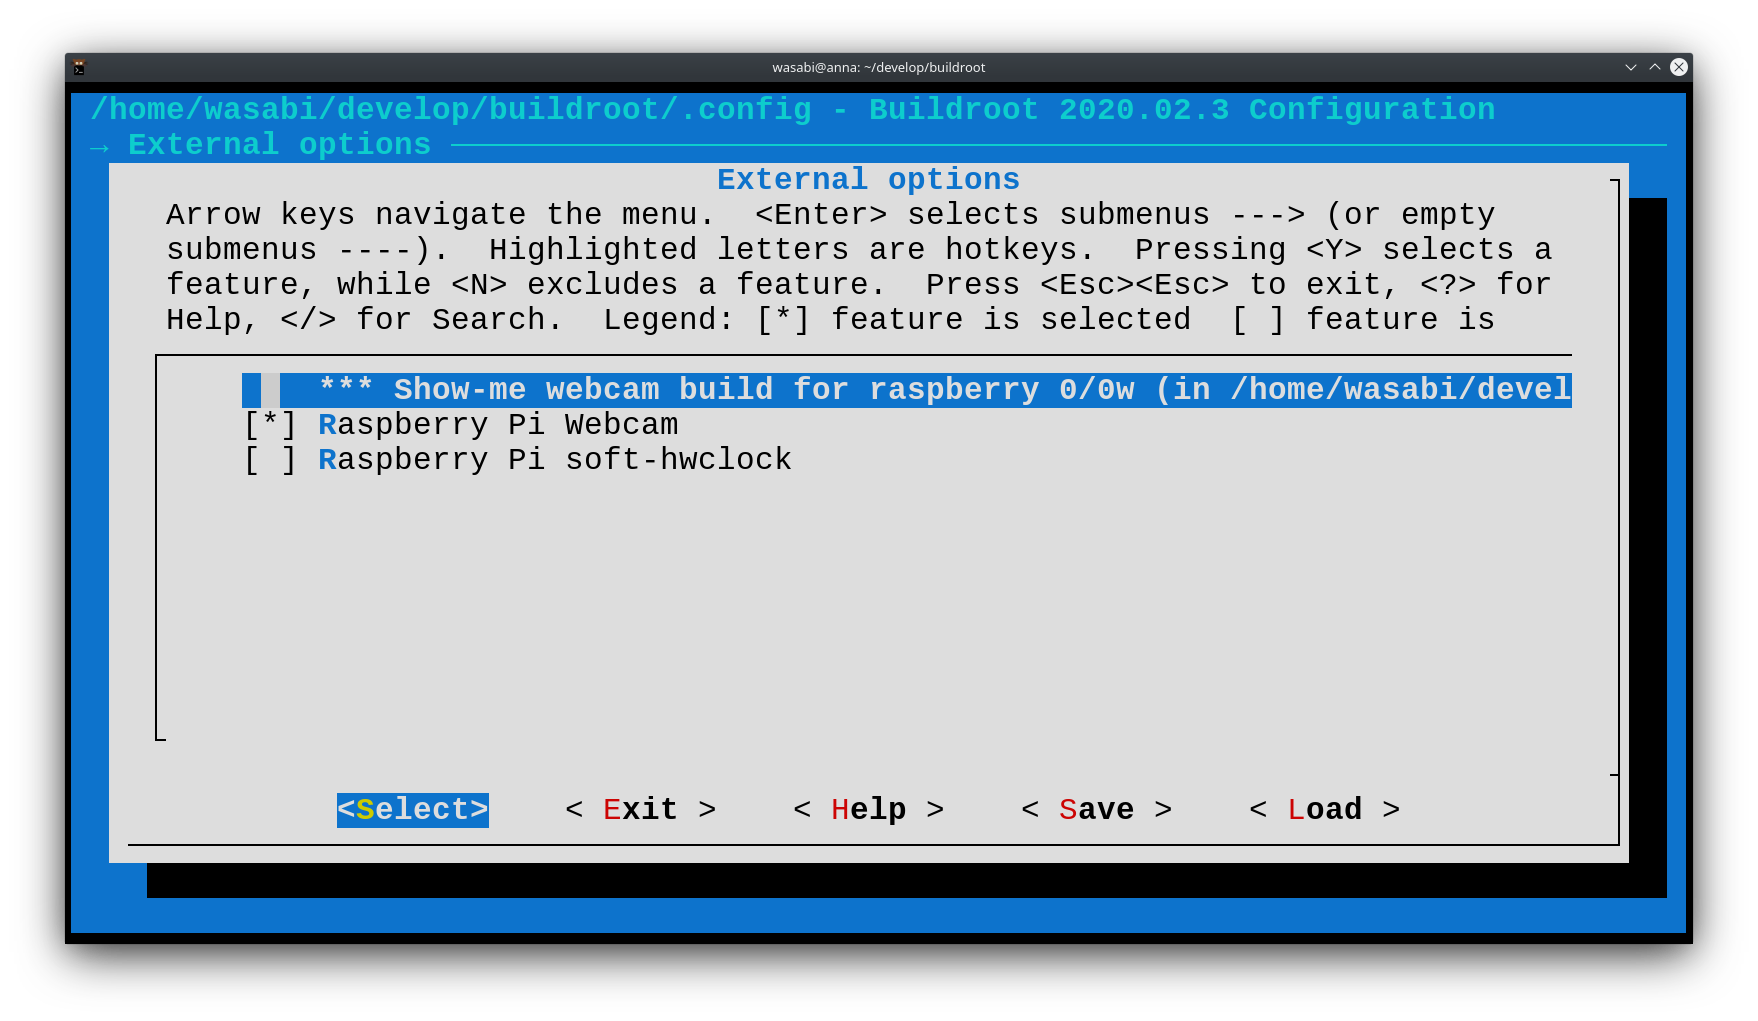
The very helpful menuconfig system that comes with buildroot
Next, it looked to me that a simple sysv-init system was going to be a growing pain. I don't know how to exactly deal with an udev system that the UVC-webcam project assumes, so I switched the init system to systemd which gives me udev automatically. But this change to systemd changes a lot of how networking is done, so getting back a console was quite frustrating. There are a couple of ways you can get a root shell to the Pi: Via ttyACM0 (the 40 pin serial headers, which I don't have soldered), via the HDMI console (tty1), or the USB port in gadget mode (ttyGS1), or via SSH (the issue was that get wireless and wired networking was not functional). The issue was that I wasn't sure of what parameters could be used to set them up when none of the venues were working. Without a way to see what wasn't working by looking at the logs or a way to fix issues on the fly, the job became significantly harder. I learned that my chroot-to-pi script helped debug boot issues. After seeing the Pi failing to give me the console, I could still chroot to the SD card and call journalctl to see what went wrong in the last boot with the script. After a while I learned of the names of the device and what went wrong, I was able to get a login prompt via the HDMI console. Once I got in the barebone Pi working with systemd, it became quite a bit easier to set up the serial console on the rest of the interfaces.
Then, I did quite a bit of reading on how to set up an external buildroot tree. This step is to avoid having to mangle between the buildroot tree and my system. I added the UVC-webcam package to my tree, that was very simple.
Then the rest was just fixing things and adding boot params in the right places until the whole system worked. The last part was to make the filesystem read-only. That task was done automatically with the rootfs being squashfs. This broke a couple of services at startup that assumed a writable rootfs, but that was not hard to fix – mounting /var as a tmpfs solved the issue.
Finally, it was time to remove all the networking support that I added for debugging purposes and just set up the serial access on the USB gadget interface.
The camera boots very quickly in 13 seconds. We can even get root on the webcam by logging in the serial interface presented on the Pi at 115200 baud as root:root.
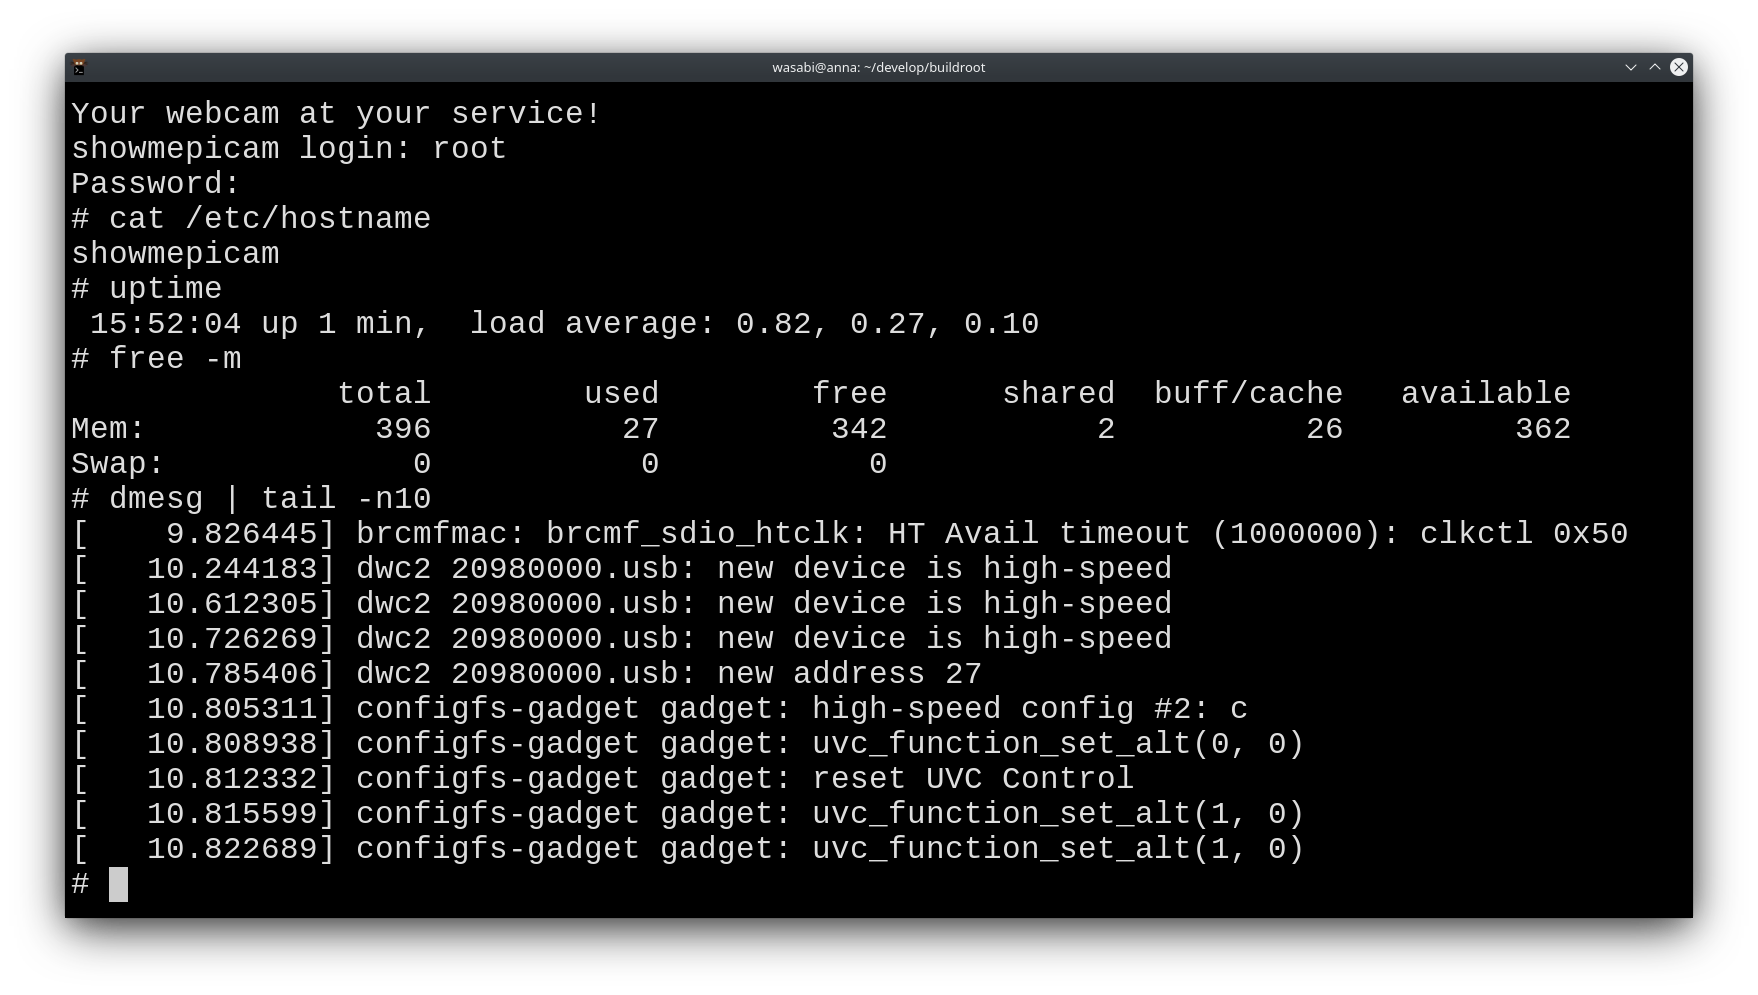
Now you can have root on your webcam too!
Quality of the Pi Webcam
Built-in Dell XPS13 2019 webcam
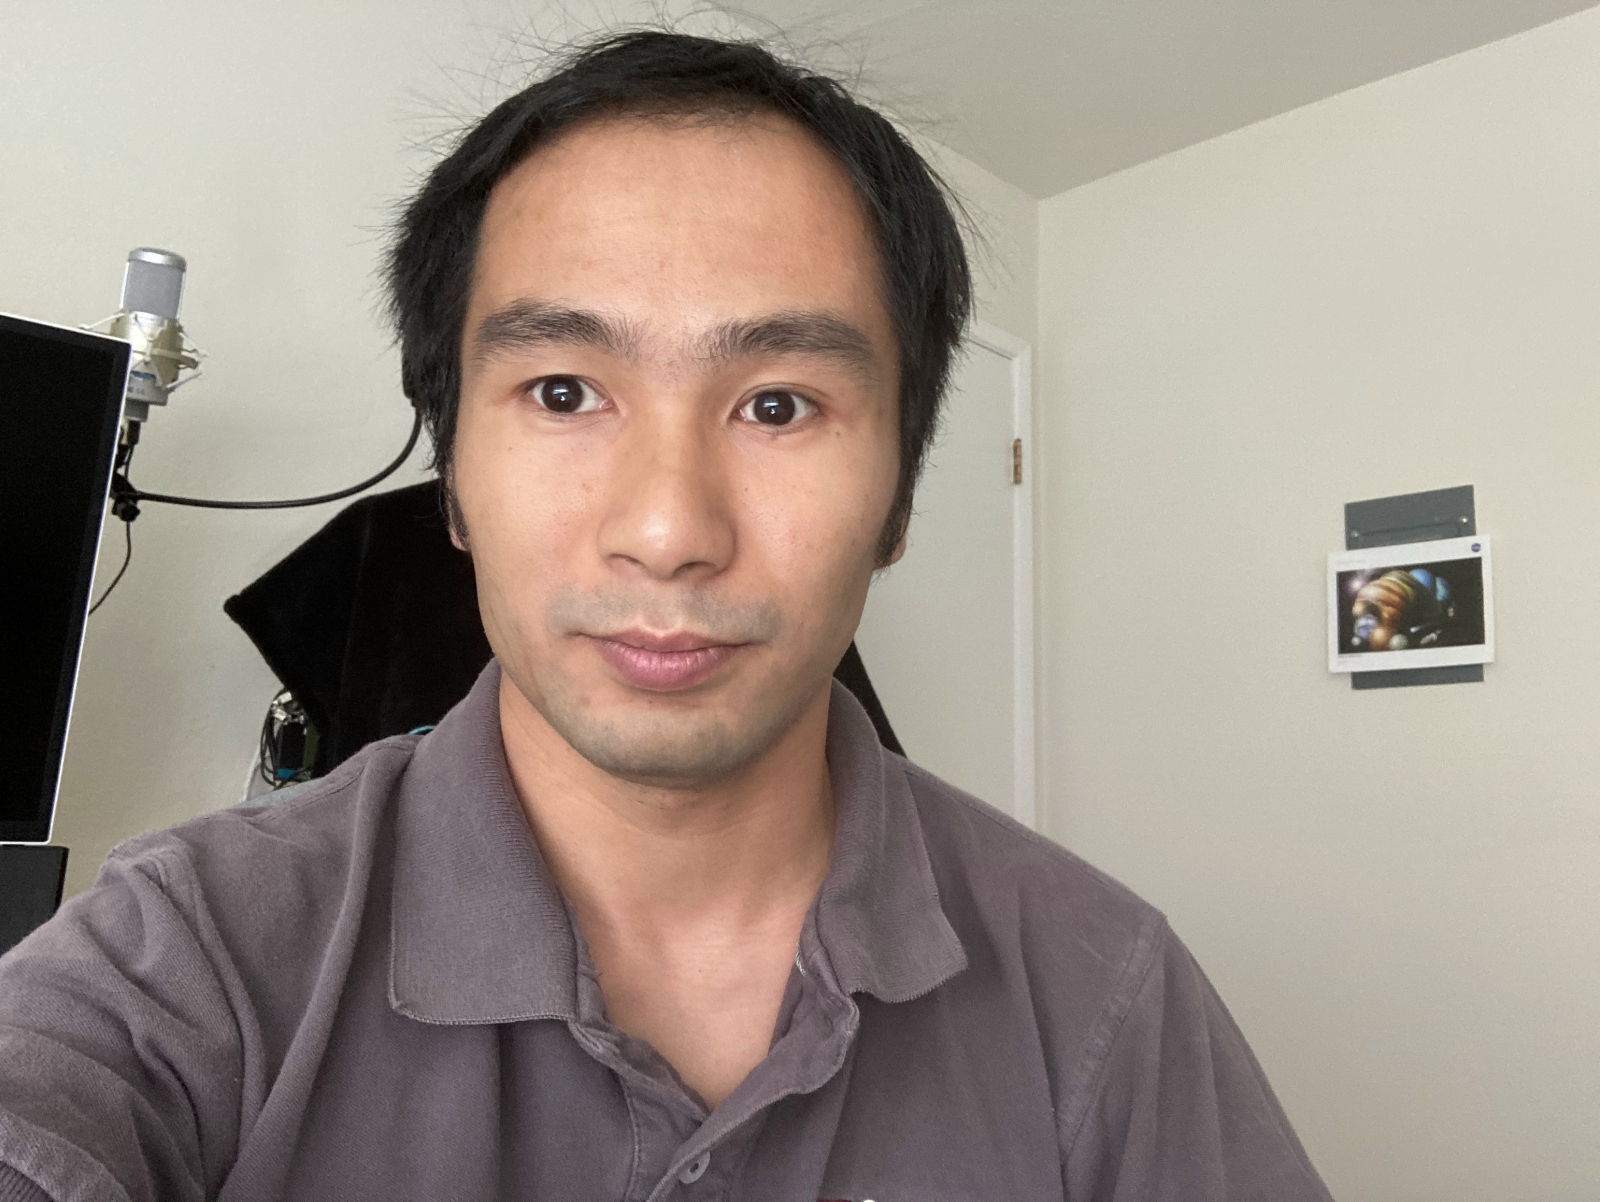
iPhone SE 2 front camera
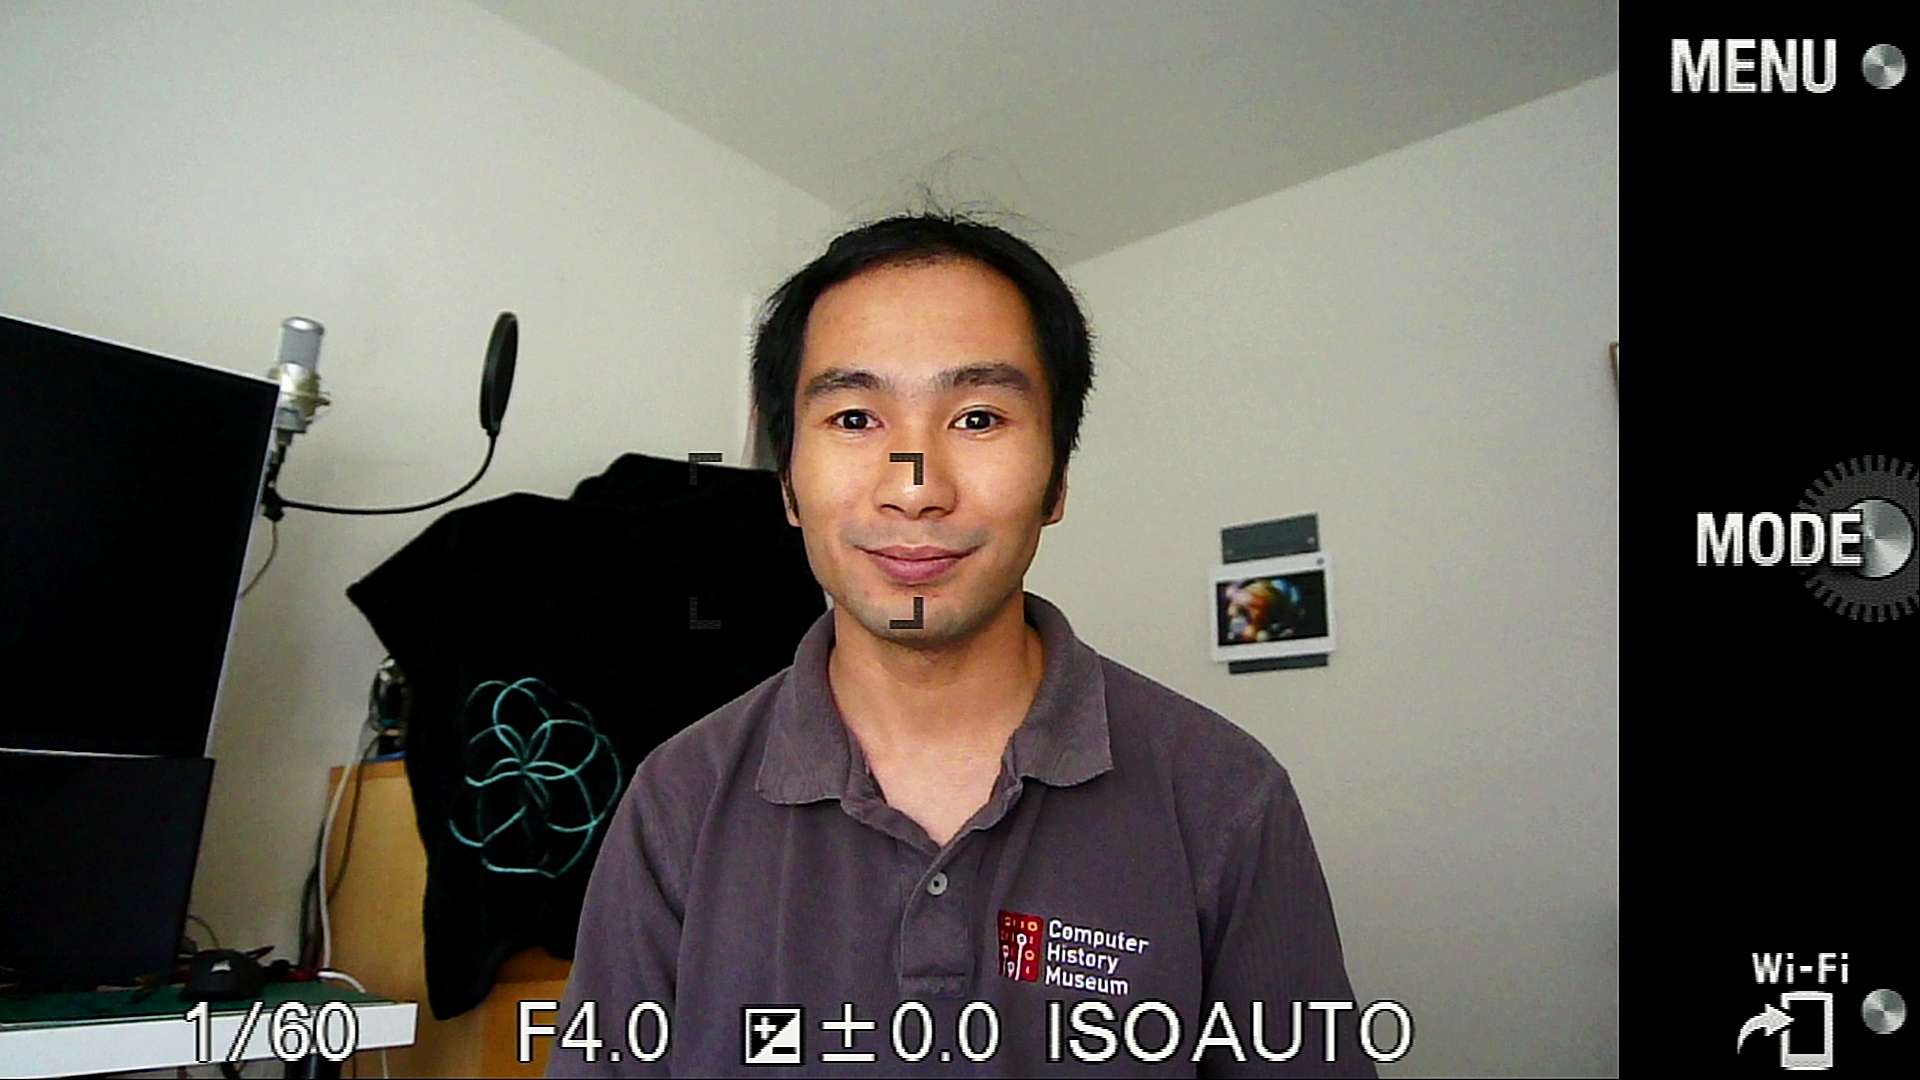
Sony NEX-5R via capture card
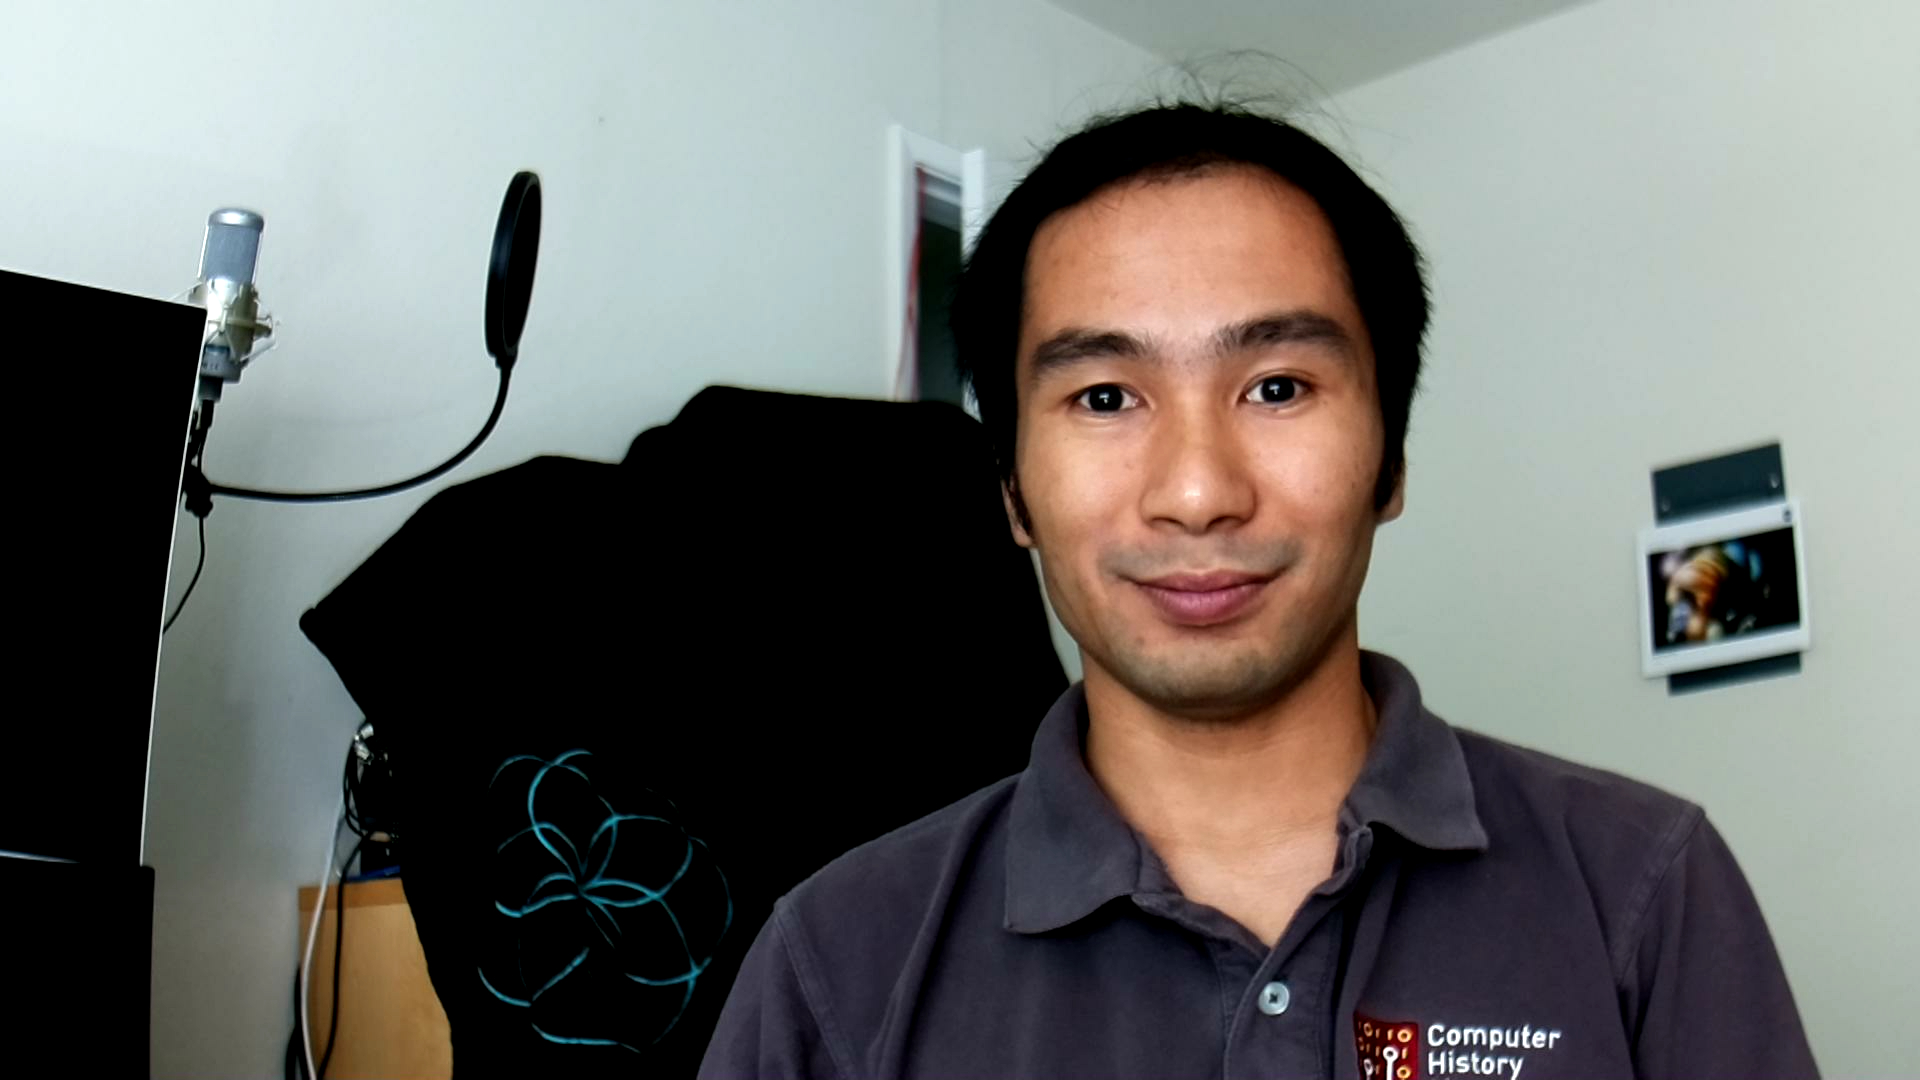
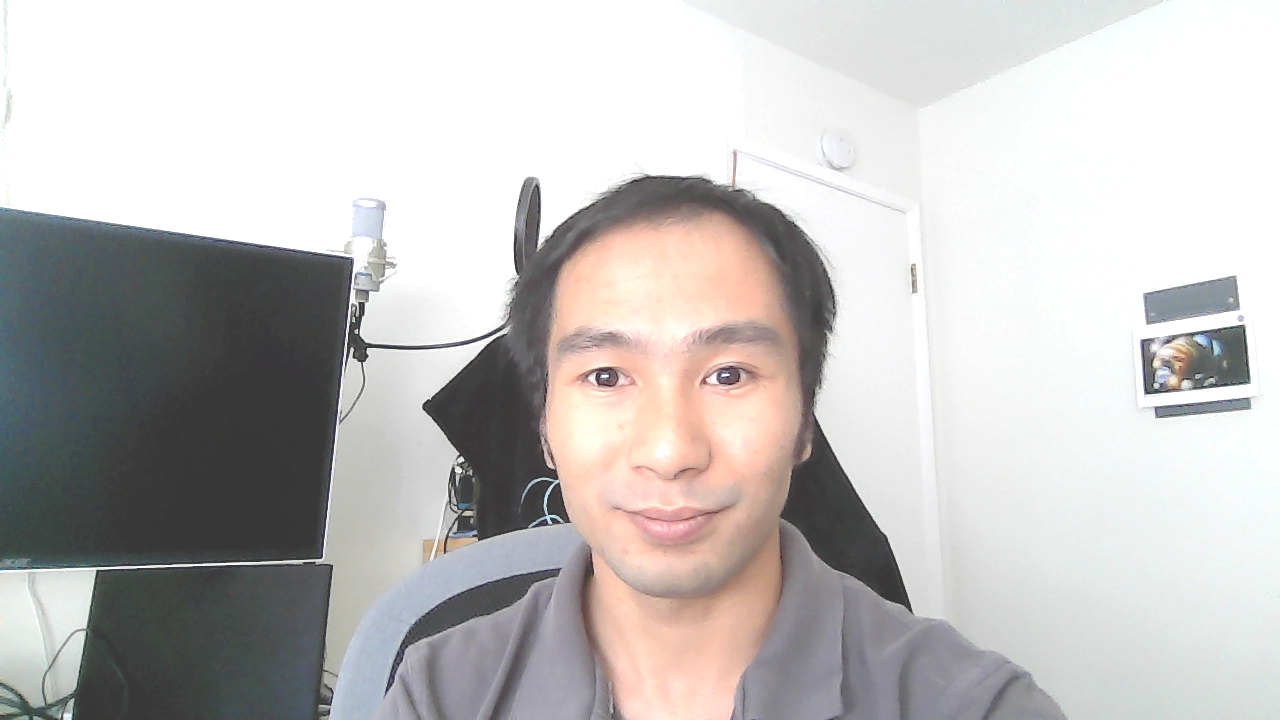
Pi Camera via Show-me Webcam
For my untrained eyes, the quality of the Pi cam is way better than a laptop webcam but a little bit worse than a dedicated camera. It does bokeh very well and has a fixed focus so I would consider it a plus rather than a minus. The camera outputs a consistent 30fps on Windows and Linux, but it does not work on macOS for some reason.
I suppose it is possible to improve the firmware/software even more. For example, we can make it so the webcam auto-pans to the face. Or maybe we can warn the user when the webcam is out of focus. Or maybe we can even replace the background. However, those are the niceties that can be added later.
If you'd like to take on the adventure with the current firmware, build it yourself, or contribute to the project, please head to the project repo.
Recipe
- Raspberry Pi 0 W (I have not tested with the Pi 0 non-Wireless)
- Pi 0 W Camera Ribbon (comes with the Pi 0 camera case or you can buy a longer one somewhere else, the stock one that comes with the camera very likely will not work).
- Raspberry Pi Camera or Raspberry Pi High-Quality Camera
- A micro SD card with at least 64MB of storage.
Directions
- Assemble the camera.
- Download the show-me webcam binary release.
- Download and use Etcher to write the image to the SD card.
- Use the USB data port (the one in the middle of the Pi, not the one on the edge) to connect to a computer.
- Enjoy!
A remark about the security of Show-me Webcam
This project is more of an exercise on embedded and open-source hardware first and a secure webcam second. I even allow root access from the host computer with a well-known password. Perhaps that's not something you would want a secure webcam to do. With the root prompt, an SD card, and a wireless-capable chip and no integrity checking, it only takes a bit of slip-up for the webcam to work against you. Please be mindful of where you plug the webcam to and who gets physical access to it. Even when root console access is disabled, someone can just as easily swap the firmware on the card when they get physical access to it. Please keep in mind that "with great power comes great responsibility." On the bright side of the problem, we should enjoy living in the day and age of being able to write a webcam firmware ourselves. I don't think it was ever possible before.